Make Tests Great Again: Powerful UI tests with Ruby, Rspec, Rake and Webdriver
With :heart: by Frederik Rodriguez
Introduction
Though most of newest FrontEnd Development projects have moved to Javascript Frameworks, leaving Fullstack frameworks (e.g JSP, ASP.Net and Ruby on Rails) in the water, still there are dozens of projects and customers out there with Rails projects; and even some of them have migrated their stacks to have API’s based on Rails, and FrontEnd in React, Angular or whatever poison they want to drink.
Here is the sweetspot where we want to work in. These projects have a strong investment in Ruby code, seasoned developers polished in the arts of Ruby and Testing based on that. Currently is extremely hard to find available Automators with Ruby expertise and here is where this article fits in, Today we will teach you the arts of creating a Testing Project using the Ruby language and the available tools.
This will be our agenda for this article
- Tools Installation and what do they do
- Creating the first tests, start from the ground, and go up
- Improving code with the Page Object Model Pattern,
- Executing tests with RSpec and Rake,
- Keeping all dependencies in check with Bundler
- WebDrivers and the tools in Ruby for it
- and so on
The basics:
Ruby
Ruby is an interpreted, multipurpose, multiparadigm, Object-Based, Hardtyped programming language, that receives a lot of praise for the simplicity of their syntax and the powerful Rails framework
Install Ruby is not hard, actually comes preinstalled in most MacOS X distributions, just in case you want to have the latest version use RVM
Open rvm.io and follow the instructions to install the manager
Once installed, just open a terminal and run
$ rvm install ruby
$ rvm --default use ruby
If you use Windows, please install Ruby for Windows
Ruby-Gems
Most of the libraries available in Ruby are packaged as gems, a gem is a library that offers a certain functionality, and you can download it and use it. This concept is similar to NPM if you come from the Javascript world.
So, let’s install our first gem
#/bin/sh
$ gem install bundler
Bundler
Bundler is a powerful dependencies manager for Ruby, Similar to NPM or Maven or NuGet
Let’s open our project directory and create our Gemfile, this file will allow us to have our list of gems to install, and simplify for future developers to have the environment ready in less time.
#/bin/sh
$ mkdir Rubytests && cd Rubytests
$ touch Gemfile
Edit the Gemfile and add this lines:
#Gemfile
source 'https://rubygems.org'
gem 'selenium-webdriver'
source 'https://rubygems.org'establishes which Gem repository are we going to use, in this case, we will go with the public repositorygem 'selenium-webdriver'is the first gem we need, let’s talk about it next:Webdriver
Webdriveris a framework that allows to simulate human interaction with a browser, using a couple of lines of code, you can open a webpage, write a query and hit the search button.
Webdriver is mature, has evolved well with time, and it has support for a dozen of different programming languages and all of the major browsers out there, of course, Ruby is included.
After we have the Gemfile updated, we run the following command:
#/bin/sh
$ bundle install
With this, Bundler should have included all gems required.
ChromeDriver
ChromeDriver is the official plugin support for the Chrome browser, install it and we can control Chrome
add this line to your Gemfile
#Gemfile
gem 'chromedriver-helper'
and execute again:
#/bin/sh
$ bundle install
Let’s get our hands dirty
The first test:
Creating a test that verify a web page is as simple as this:
open a terminal in the root folder and create a file:
#/bin/sh
$ touch Keyboard_test.rb
And write the following code into the Keyboard_test.rb
# The libraries we need, for the tests we build.
require "selenium-webdriver"
require "chromedriver-helper"

# Lets open a Chrome Driver
driver = Selenium::WebDriver.for :chrome

# Navigate.to indicates Chrome which webpage to open
driver.navigate.to "https://formy-project.herokuapp.com/form"

# find_element allows to interact with an element based on its ID, CSS selector or Xpath
driver.find_element(id: 'first-name').send_keys('John')

# send_keys allows to fill a form field
driver.find_element(id: 'last-name').send_keys('Doe')

# click allows to hit the button
driver.find_element(css: '.btn.btn-lg.btn-primary').click()
banner = driver.find_element(class: 'alert')

#Always close the browser when your tests are over
driver.quit
In our terminal execute:
#/bin/sh
$ ruby Keyboard_test.rb
Page Object Model
Though this test is perfectly functional, there are several things that pop up to eye of the seasoned developer:
- What if we need to make more similar tests?, Like testing every single field for negative results.
- What if the locators change and you have dozens of tests in different files?
- Having implementation details in test files usually is a bad code smell.
- There are lots of code that can be reused instead of repeated.
- The Webdriver code can be placed in a base class and reuse all the way around.
Here is where we will start improving our code.
The Page Object Model is a powerful pattern that allows to centralize business logic in classes that are specialized for a certain part of the Application under test, then allows to use that business logic in different tests, this way we can improve:
- how many tests do we write
- we mask the access to webdriver functionality
- reduce the costs included with rewriting accessors
- build smaller, more maintainable functions that are simpler to understand and modify
Let’s begin with a base page, and check a powerful concept in Ruby, Inheritance:
Inheritance in OOP
The basic idea behind Object Oriented languages is to centralize business logic in classes that represent real life elements (Like an employee, a car or a Webpage). In Ruby we can apply this concept in a simple manner:
In our project directory, let’s create a folder for our pages, remember, a well organized code is a happy code
#/bin/sh
$ mkdir pages && cd pages
$ touch TravelsBasePage.rb
and put the following code inside:
# Base page
require 'selenium-webdriver'


class TravelsBasePage #::Class:: is the  keyword

 def initialize(driver) # Initialize is the method invoked by Ruby when a new class is invoked
    @driver = driver # Lets share the same driver always

    # Set configurations for driver, global for all objects that use this driver
    @driver.manage.timeouts.implicit_wait = 10 # Implicit wait
    @driver.manage.window.maximize # We want to have our Browser full screen all time.
  end

  def getDriver # Accessor methods
    @driver
  end

  def finalizeDriver # Utility to close the driver
    @driver.quit
  end
end
This first page does not do a lot, yet gives us a glimpse of the power of classes.
Implicit Wait
@driver.manage.timeouts.implicit_wait = 10
Here we have a powerful concept of Webdriver, Implicit wait. UI tests usually execute at a blazing pace, and it is common to have failing tests because the webdriver works faster than the application under test. Implicit wait orders the webdriver to continuously verify if an element is available and fail only if more than certain amount of time has passed (10 seconds in this case)
Implicit wait allows to have cleaner code and sturdier tests that do not fail as often for delays in the application under test.
Here comes the logger
We can add logging functionalities to our tests using the simple logger gem
In our TravelsBasePage.rb we add the following code
require 'selenium-webdriver'
require 'logger' # import the logger gem

class TravelsBasePage
  def initialize(driver)
    @driver = driver
    # Basic logger, with output to the console, this logger will be used for all classes that inherit our base class
    @logger = Logger.new(STDOUT)
    @driver.manage.timeouts.implicit_wait = 10 # seconds
    @driver.manage.window.maximize
  end

  def getDriver
    @driver
  end

  def finalizeDriver
    @driver.quit
  end
end
Let’s Inherit our base class
We will use our base class as the starting point for other classes, there we will have our Business Logic
But first let’s see our Application Under test:
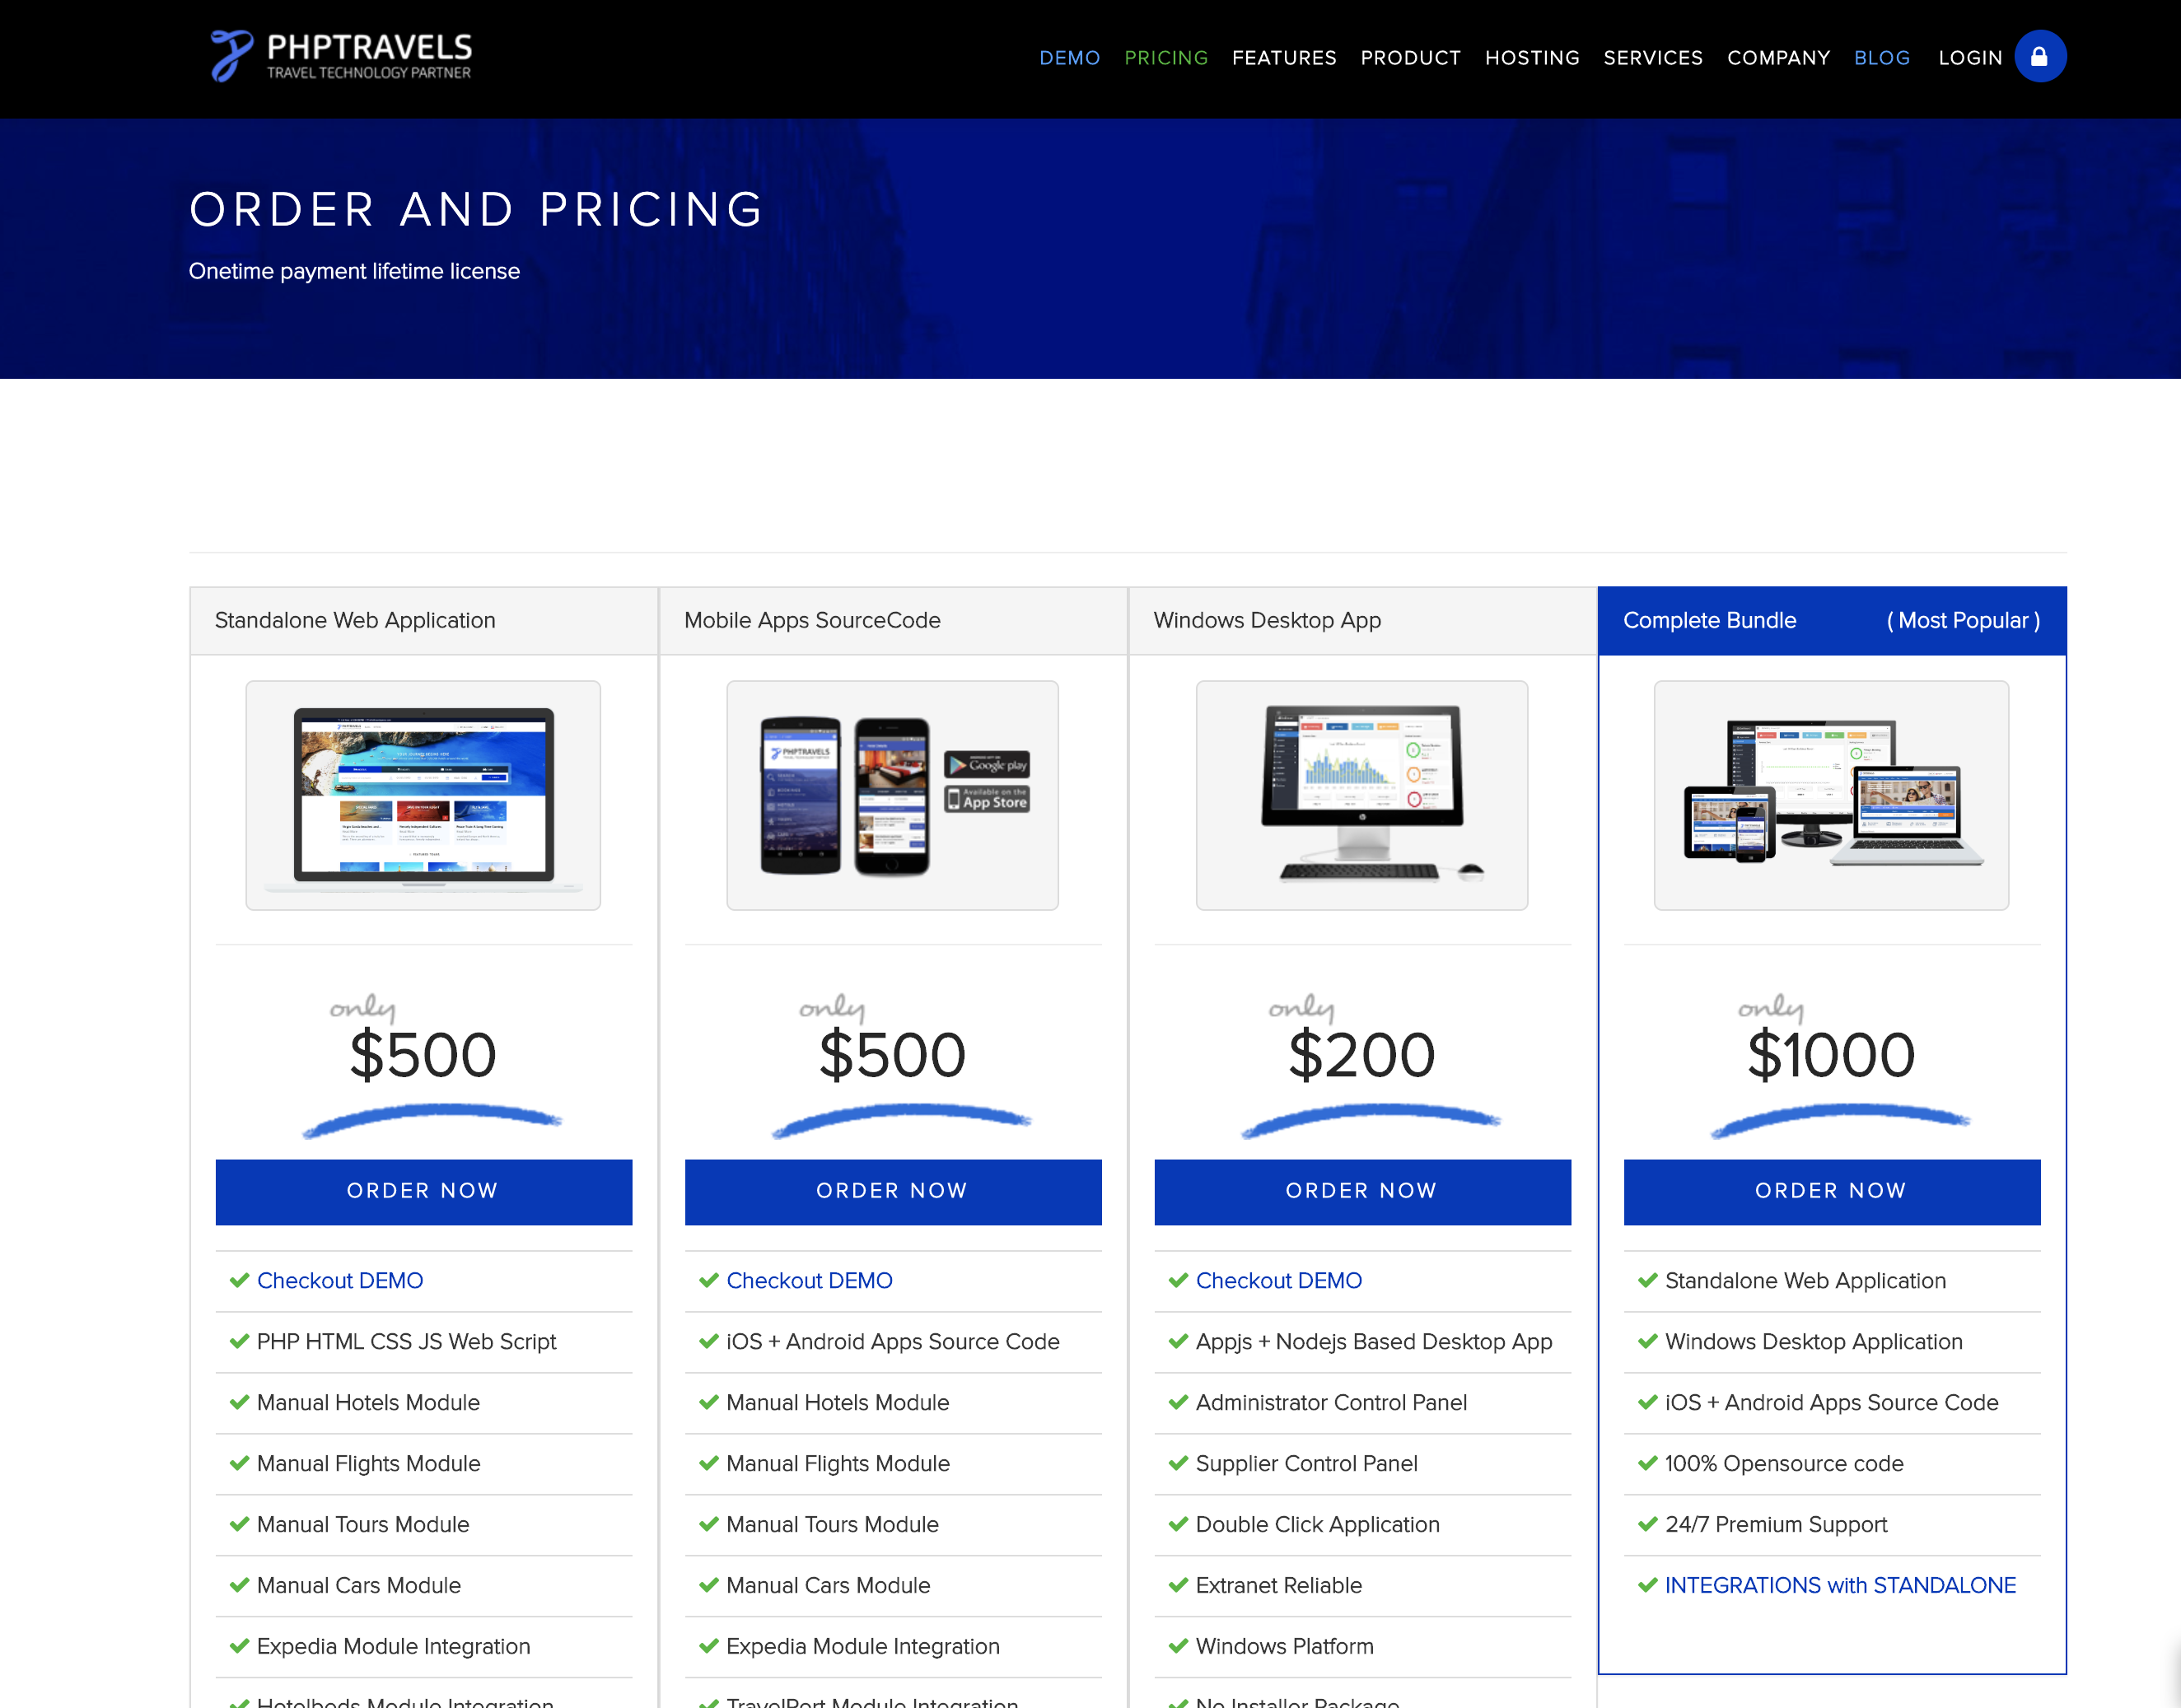
At first sight we can see certain logic we can use:
- We want to see which plans are available
- We would like to verify if an specific plan can be bought at every time
- We may want to count how many plans are always available, in case we have a moving offer of plans, so let’s begin with that:
Let’s go back to the root of our project folder and execute the upcoming commands
$ touch pages/OrdersPage.rb
And put inside the following code
require 'selenium-webdriver'
require_relative 'TravelsBasePage'

class OrdersPage < TravelsBasePage # The < symbol expresses inheritance
  def initialize(driver) # Let's initialize our class with the required elements
    @url = 'https://phptravels.com/order/' #This is our initial URL, our AUT

    super(driver) # With super we can access the constructor of our parent class
    @driver.navigate.to @url
    @logger.info("Created #{self.class.name}") # We will talk abour our logger later
  end
end
We will start our class with the basics,
- one initializer that will call the parent object
super(driver)and will send a shared Webdriver for it. - Our class has straight access to our application under test
@url='https://phptravels.com/order/', and it will navigate to it when it starts@driver.navigate.to @url
Let’s add the first business logic method, search for all of the offers:
require 'selenium-webdriver'
require_relative 'TravelsBasePage'

class OrdersPage < TravelsBasePage # The < symbol expresses inheritance
  def initialize(driver) # Let's initialize our class with the required elements
    @url = 'https://phptravels.com/order/'
    @offersSelector = '.tab-content .col-md-3' # the locator for our offers
    super(driver)
    @driver.navigate.to @url
    @logger.info("Created #{self.class.name}")
  end

#::: NEW CODE :::
#The list of offers is offered as an array of Elements
   def listOfOffers
   # we tell our Webdriver to give us the list of offers using find_elements
    offers = @driver.find_elements(css: @offersSelector)
    @logger.warn("There are #{offers.count} offers" )
    offers
  end

# We will use the method given before to count the amount of offers
  def getAmountOfOffers
    $offers = listOfOffers() # Look Ma, code reuse
    $offers.count()
  end
end
Our two methods do this:
- we create a method named
listOfOffersthat returns the list from the page.- We use
find_elementsto get the list of offers and return it.
- We use
- We create a
getAmountOfOffersto count the offers we have- We use the
listOfOffersmethod and count the elements in the list.
- We use the
Now let’s create a test that will use our OrdersPage.
Go to the root of our project, and execute the following commands:
$ mkdir -p tests/UI @@ cd tests/UI
$ touch PHPTRAVELS_orders_test.rb
It is important to separate our pages code from our tests code.
Remember, a clean code, is a happy code.
Rspec
Rspec is a test execution framework for Ruby, pretty similar to JUnit or Jasmine. It is simple to use, has great tooling and good support for reporting; I will show you how it works:
First of all, let’s add the gem we need, open the Gemfile and add:
source 'https://rubygems.org'
gem 'selenium-webdriver'
gem 'chromedriver-helper'
# Here it comes Rspec
gem 'rspec'
$ bundle install
Run bundler again in a console and the dependency is added to our repo
In our PHPTRAVELS_orders_test.rb add the following code
require 'selenium-webdriver'
require 'rspec'
require 'chromedriver-helper'
require_relative '../../pages/OrdersPage' #Import our PageObject

# All tests begin with describe
describe 'Verify PHPTravels.com site' do

  # Before and After filters execute code that needs to be ran before every test.
  before(:each) do
  # Lets create the driver for each test
    @driver = Selenium::WebDriver.for :chrome
  end

# End the driver after each test execution to avoid problems with concurrency
  after(:each) do
    @driver.quit
  end

# < It > keyword defines a test
  it 'has 4 types of offers' do

    orders = OrdersPage.new(@driver)

    # this is our Business logic, condensed, no leaking code, no webdriver or locators in our tests
    $result = orders.getAmountOfOffers
    # Powerful assertions built in Rspec
    expect($result).to be(4)
  end
This is the basic of Rspec:
- you create a suite using
describe - You can add startng and finishing logic using
beforeandafter(This is optional) - Each test is written in a
itmethod, with a self-explanatory name, that tells what the test is verifying. - Remember our Application under test, there were 4 offers, and now we have a test that will verify that.
Let’s add more tests:
In our OrdersPage file let’s add the following logic
require 'selenium-webdriver'
require_relative 'TravelsBasePage'

class OrdersPage < TravelsBasePage
  def initialize(driver)
    @url = 'https://phptravels.com/order/'
    @offersSelector = '.tab-content .col-md-3'
    super(driver)
    @driver.navigate.to @url
    @logger.info("Created #{self.class.name}")
  end

  def listOfOffers
    offers = @driver.find_elements(css: @offersSelector)
    @logger.warn("There are #{offers.count} offers" )
    offers
  end

  def getAmountOfOffers
    $offers = listOfOffers()
    $offers.count()
  end

# ::: NEW CODE :::
  def offersPackage(packageName)
    $itOffers = false
    offers = listOfOffers()
    offers.each do |offer|
      $offerText = offer.find_element(css: '.panel-heading')
      if $offerText.text.include? packageName
        $itOffers = true
        break
      end
    end

    $itOffers
  end

end
This is what our new method does:
- Uses the
listOfOffers()logic to get all of the offers - iterate thru them
offers.each do |offer| - when the name of the offer
$offerText = offer.find_element(css: '.panel-heading')matches the parameter$offerText.text.include? packageNamereturnstrue - returns
falseif no offer is sold with the given name.
Now make tests to use the new functionality
require 'selenium-webdriver'
require 'rspec'
require 'chromedriver-helper'
require_relative '../../pages/OrdersPage'

describe 'Verify PHPTravels.com site' do
  before(:each) do
    @driver = Selenium::WebDriver.for :chrome
  end

  after(:each) do
    @driver.quit
  end

  it 'has 4 types of offers' do
    orders = OrdersPage.new(@driver)
    $result = orders.getAmountOfOffers
    expect($result).to be(4)
  end

# ::: NEW CODE :::
  it 'offers Standalone Web Apps' do
    orders = OrdersPage.new(@driver)
    $result = orders.offersPackage('Standalone Web')
    expect($result).to be(true)
  end

  it 'offers Windows Desktop App' do
    orders = OrdersPage.new(@driver)
    $result = orders.offersPackage('Windows Desktop')
    expect($result).to be(true)
  end

  it 'offers Complete Bundle' do
    orders = OrdersPage.new(@driver)
    $result = orders.offersPackage('Complete Bundle')
    expect($result).to be(true)
  end
end
Note that the code is pretty similar, and the reusability is at a high level.
Now let’s run our tests, in a terminal in the root of our project execute:
$ rspec tests/UI/PHPTRAVELS_orders_test.rb
If everything goes right, A Chrome Browser must show and do automatically all our tests.
Reporting.
Rspec includes a simple suite of reports, that can give us HTML reports of our tests. let’s configure it
$ rspec tests/UI/PHPTRAVELS_orders_test.rb --format html --out results.html
$ open results.html
You should see a nice HTML report with our tests:

Rake
Rake is a powerful task executor for Ruby, similar to Maven or NPM. It has support for dozens of projects and is the standard de-facto for task execution in Ruby projects, let’s add it to our project and configure it to execute our tests.
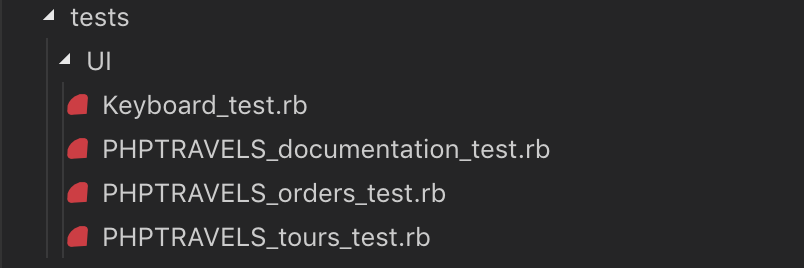
In Automate-rubies we added some more tests that we will discuss in future articles, yet you can read them for ideas
Lets see the tests we have:
Now, with this in mind, let’s configure Rake
Lets begin with the Gemfile
source 'https://rubygems.org'
gem 'selenium-webdriver'
gem 'chromedriver-helper'
gem 'rspec'
# Here comes Rake
gem 'rake'
Update the dependencies
$ bundle install
Now let’s create a Rakefile in our root folder
$ touch Rakefile
and edit the file with the following code:
require 'rake'
require 'rake/testtask'
require 'rspec/core/rake_task'


RSpec::Core::RakeTask.new(:spec) do |t|
t.pattern = Dir.glob('tests/**/*_test.rb')
t.rspec_opts = '--format html'
t.rspec_opts << ' --out results.html'
# t.rspec_opts << ' more options'

end

task :default => :spec
We did the following:
- The task
RSpec::Core::RakeTask.new(:spec) do |t|is provided by RSpec - We configure Rspec to execute all files that are in the tests directory and have the suffix
_test.rb`t.pattern = Dir.glob(‘tests/*/_test.rb’) - Finally we added the html output
t.rspec_opts = '--format html't.rspec_opts << ' --out results.html' - And we defined the spec task to be the default task
task :default => :spec
Now we can execute our tests as simple as:
$ rake
We can see the report in html:

What did we learn?
In this article we learned:
- The basics of Webdriver and Ruby
- Improving our code with POM
- Using Logging, Reporting and Rspec
- Using Bundler to control our dependencies
- Use Rake as a Task executor
Don’t forget that You can create basic tests with the basic tests of this article, yet as your codebase grows, I strongly recommend to follow the Page Object Model Pattern.
The repo
All of the code in this article is in this repository: repo and it is free to use